|
|
||
|---|---|---|
| benchmark | ||
| data/trafficflow | ||
| doc | ||
| environment | ||
| exp | ||
| federatedscope | ||
| figures | ||
| materials | ||
| scripts | ||
| tests | ||
| .flake8 | ||
| .gitignore | ||
| .pre-commit-config.yaml | ||
| .style.yapf | ||
| LICENSE | ||
| README.md | ||
| meta.yaml | ||
| setup.py | ||
README.md
FedDGCN: A Scalable Federated Learning Framework for Traffic Flow Prediction
This is the official repository of FedDGCN: A Scalable Federated Learning Framework for Traffic Flow Prediction.

FedDGCN extends FederatedScope to support federated traffic flow prediction.
Note: This is an early version of FedDGCN. The full version will be released after testing is completed.
Table of Contents
1. Environment Setup
Step 1: Create a Conda Environment
We recommend using a Conda virtual environment. This project supports Python 3.9 (recommended) and Python 3.10.
Warning: Python 3.11 and later versions are not compatible.
conda create -n FedDGCN python=3.9
conda activate FedDGCN
Step 2: Install PyTorch
Download the appropriate version of PyTorch based on your device.
This project has been tested with Torch 2.4.0 (recommended) and Torch 2.0.0 with CUDA 12. Compatibility with other versions is not guaranteed.
Step 3: Install FederatedScope
Clone this repository and install it:
cd FS-TFP
pip install -e .
Additionally, install the required packages to avoid warnings:
pip install torch_geometric community rdkit
2. Run the Code
Step 1: Prepare the Datasets
Download the PeMS datasets from the STSGCN repository.
After downloading, extract the datasets and place them in the ./data/trafficflow directory.
The directory structure should be as follows:
FS-TFP/data/trafficflow
├─PeMS03
├─PeMS04
├─PeMS07
└─PeMS08
Step 2: Configure the Settings
Run scripts for the four datasets are located in the ./scripts/trafficflow_exp_scripts/ directory.
Each dataset has a YAML configuration file: {D3, D4, D7, D8}.yaml.
To replicate the experimental outcomes, we advise executing the scripts as they are, without altering any parameters.
You can customize the parameters or use the presets. Key configurable parameters include:
# Line 3: GPU device to use (for multi-GPU machines)
device: 0

# Line 8: Total number of training rounds
total_round_num: <number_of_rounds>

# Line 9: Number of clients
client_num: <number_of_clients>

# Line 65: Training loss function
# Options: L1Loss, RMSE, MAPE
criterion:
  type: <loss_function>
Warning: Processing the PeMSD7 dataset may require more than 32GB RAM.
If your system lacks sufficient RAM, increase the size of the swap partition.
Step 3: Run the Experiments
Use the following commands to run FedDGCN:
# Run experiments on different datasets
python federatedscope/main.py --cfg scripts/trafficflow_exp_scripts/D3.yaml  # PeMSD3
python federatedscope/main.py --cfg scripts/trafficflow_exp_scripts/D4.yaml  # PeMSD4
python federatedscope/main.py --cfg scripts/trafficflow_exp_scripts/D7.yaml  # PeMSD7
python federatedscope/main.py --cfg scripts/trafficflow_exp_scripts/D8.yaml  # PeMSD8
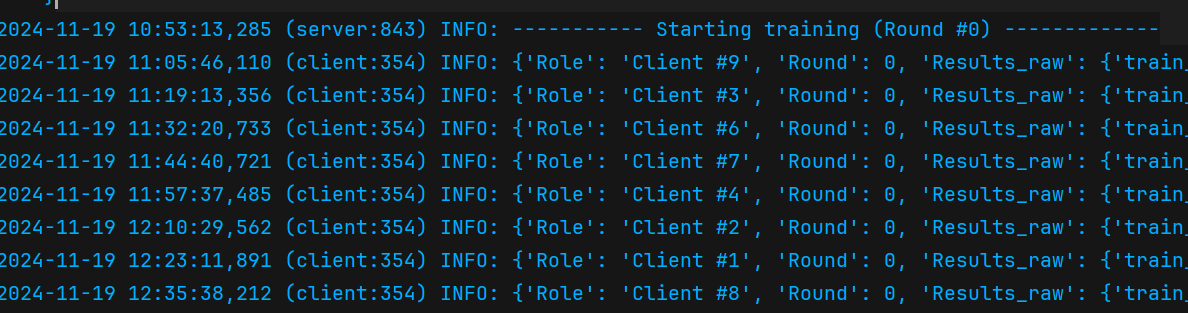
If you see output similar to the image below, congratulations! You have successfully run the experiment:
3. Visualize Results
The experiment logs will be saved in the exp folder.
We provide a script, global.py, in the same folder. Replace the old logs with the new logs from the experiments and run the script to visualize the results:
python exp/global.py
This will generate a baseline.jpg file to visualize the logs.
To install the required package for visualization:
pip install matplotlib
4. Citation
TBD
5. Acknowledgements
Special thanks to the authors of FederatedScope, upon which this project is built.
We also express our gratitude to the following projects: AGCRN, STG-NCDE, RGDAN.
How to improve our framework?
We welcome the community to help expand and improve our framework! This guide outlines how to customize configurations, models, datasets, trainers, and loss functions.
📋 How to Add Configurations
-
Create a YAML file
Use the./scriptsfolder as a reference. We recommend copying an existing configuration and modifying it. -
Update Core Configurations
Go to./federatedscope/core/configs/, locatecfg_model, and add your configurations with default values. For example:cfg.model.num_nodes = 0 cfg.model.rnn_units = 64 cfg.model.dropout = 0.1 -
Add Nested Parameters
If needed, create nested parameters usingCN():cfg.model.next = CN() cfg.model.next.default = 1 -
Sync Parameters Across Configs
Ensure the parameters incfg_modelalign with those in other configs (e.g.,cfg_trafficflow) to avoid compatibility issues across systems (Windows, Linux, etc.). -
Customize YAML
After adding parameters to config files (e.g.,cfg_data,cfg_training), customize them in the corresponding YAML file.
🛠️ How to Add a Model
-
Create Your Model
Save your model in thefederatedscope/trafficflow/model/folder (or another location of your choice).
Add the model name tomodel:typein the configuration YAML file. -
Register the Model
Infederatedscope/core/auxiliaries/model_builder.py, add logic for your model (around line 214):elif model_config.type.lower() in ['your_model']: from federatedscope.trafficflow.model.your_model import YourModel model = YourModel(model_config)
📊 How to Add a Dataset
-
Create a DataLoader
Implement a function infederatedscope/trafficflow/dataloader/to generate data for clients. The function should return a list of dictionaries (one per client) with['train'],['val'], and['test']datasets. Each dataset should be atorch.utils.data.TensorDatasetcontainingxandlabeltensors. -
Register the DataLoader
Updatefederatedscope/core/data/utils.py(around line 108) to import your dataloader:elif config.data.type.lower() in ['trafficflow']: from federatedscope.trafficflow.dataloader.traffic_dataloader import load_traffic_data dataset, modified_config = load_traffic_data(config, client_cfgs)
🎓 How to Customize Your Trainer
-
Create a Custom Trainer
Implement your trainer infederatedscope/trafficflow/trainer/. Inherit from an existing trainer, e.g.:from federatedscope.core.trainers.torch_trainer import GeneralTorchTrainer as Trainer class TrafficflowTrainer(Trainer): # Overwrite methods or hooks as needed -
Reference Examples
Review existing trainers for additional guidance.
🔧 How to Add a Custom Loss Function
-
Implement the Loss Function
Create a file infederatedscope/contrib/loss/and write your custom loss function. -
Register the Loss Function
Register your loss function usingregister_criterion:from federatedscope.register import register_criterion register_criterion('RMSE', call_my_criterion) register_criterion('MAPE', call_my_criterion) -
Update Configuration
Set the loss function in the configuration YAML file usingcriterion:type.
By following these steps, you can extend and customize the framework to meet your needs. Happy coding! 🎉